Stinky Slinkey Upgrade (Part 3)
It finally happened…the dreaded Sanicon Turbo Pinhole leak. For those who have experienced…you know…for those who don’t…it is not an explosion, but it is nasty.
We did everything we could to prevent this from happening (see the previous upgrade parts) with a cover to protect the hose, etc…but alas…it still happened to us.
The Crime
I knew something was not right when my wetbay had a layer of water in the bottom of it. I could not tell if the water was fresh water leaking (I had just finished my full install of the Water Softener system a week or so before so it could have been related to that. The bay happened to be very, very dirty because our Sanicon hose had been in a very dirty environment and there was no way to clean it off when we were headed out…so after first noticing the water in the bottom. The last time we dumped before leaving the campground…we found all the evidence we needed of the crime.
The Evidence
The facts of the case are pretty straightforward. There was a strong ‘odor’ that usually did not happen while dumping. The cover I installed over the sanicon turbo hose was visibly getting wetter, and the wet bay was getting a pool of liquid in it…and the liquid was not clear!!!! Based on the evidence, there looked like there was a pinhole in the hose inside the wetbay…about 6-8″ above where the hose drops through floor. EWWWWW.
We did not have time to fix it right then, and the wet bay was already ‘contaminated’ so I flushed the grey, put the hose back in as I had to do something with it, and off we rolled to the Texas Motor Speedway for the NIRVC Customer Appreciation Rally.
The Fix
After experiencing this travesty, I wanted to ensure that it would NEVER NEVER NEVER happen again. I don’t mean that there is never another chance for a pinhole, but just that if one does happen, it DOES NOT HAPPEN INSIDE THE WETBAY (it was really really nasty).
To accomplish this, I decided I wanted to once again leverage my trusty Banjo connections, but make it so that the Sanicon Turbo hose was completely removable for travel and connected outside of wet bay. I purchased 4′ of Spa hose from Lowes and did not even have to cut it!
Connecting the spa hose to the connection in the back of the Sanicon Turbo (where the old hose connected) was the hardest part of this job. First of all, its way in the back and very tight (I got several cuts on my hand trying to get the hose on). Second, the fit is very, very tight. I highly recommend using a heat gun (or a hair dryer…this was the 3rd I’ve ‘borrowed’ from Tonya that she did not want back…but those are other stories). After heating the hose up nice and warm and then struggling (and struggling and struggling) I got it far enough up on the barbed pipe to consider it safe. Added some hose clamps and it was nice and secure.
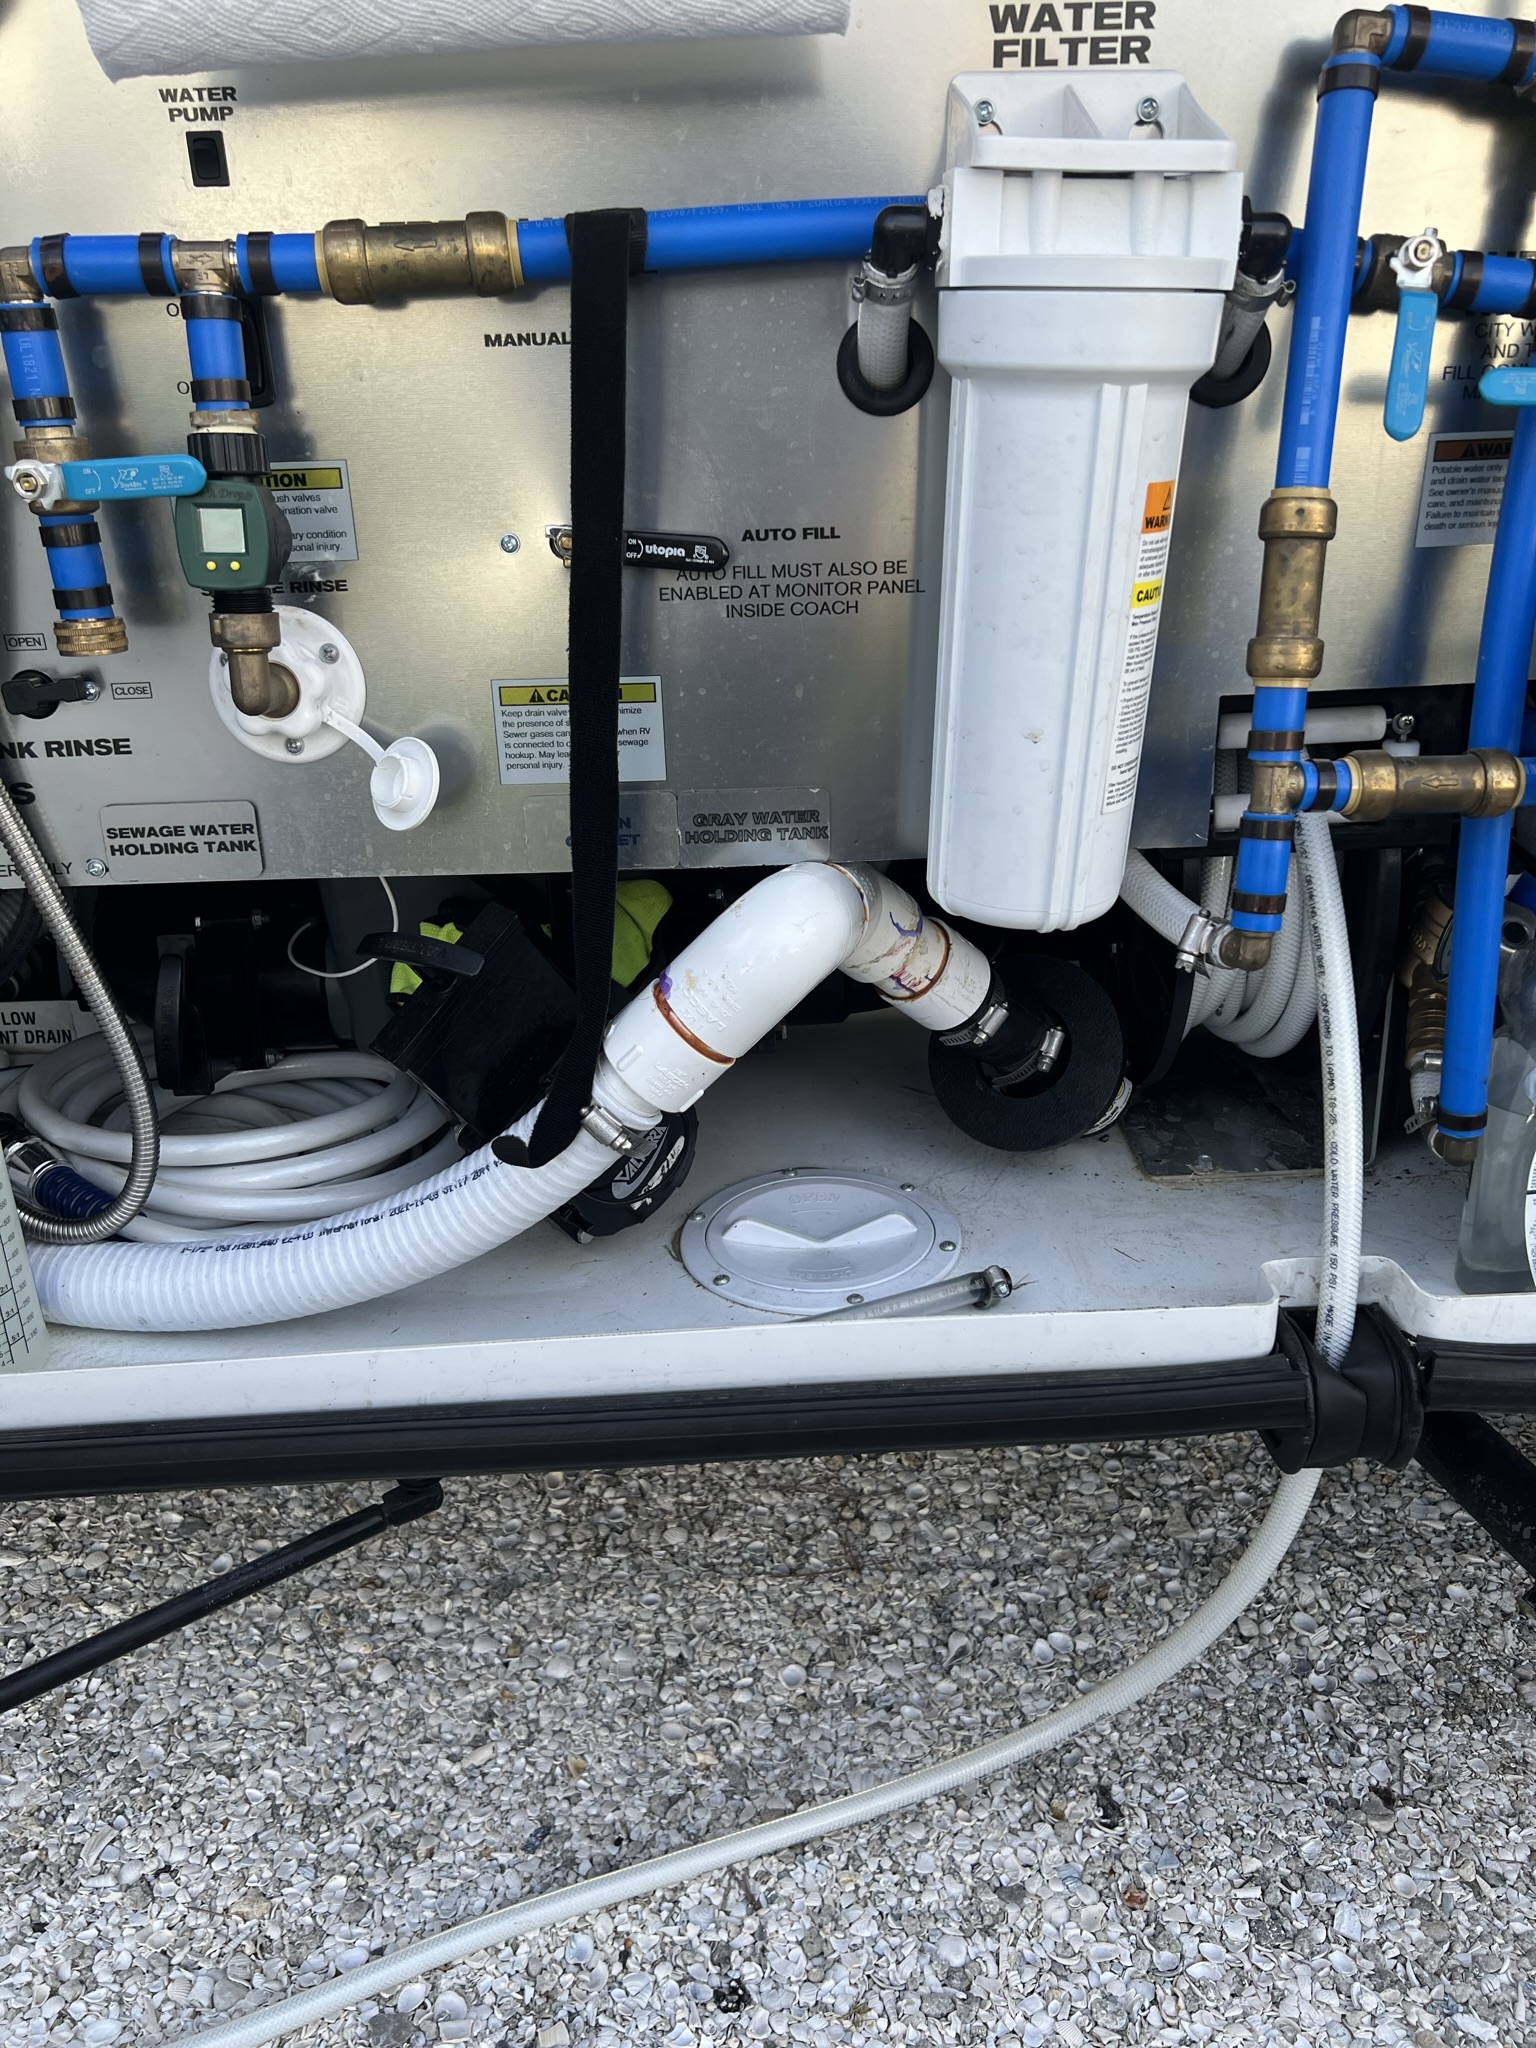
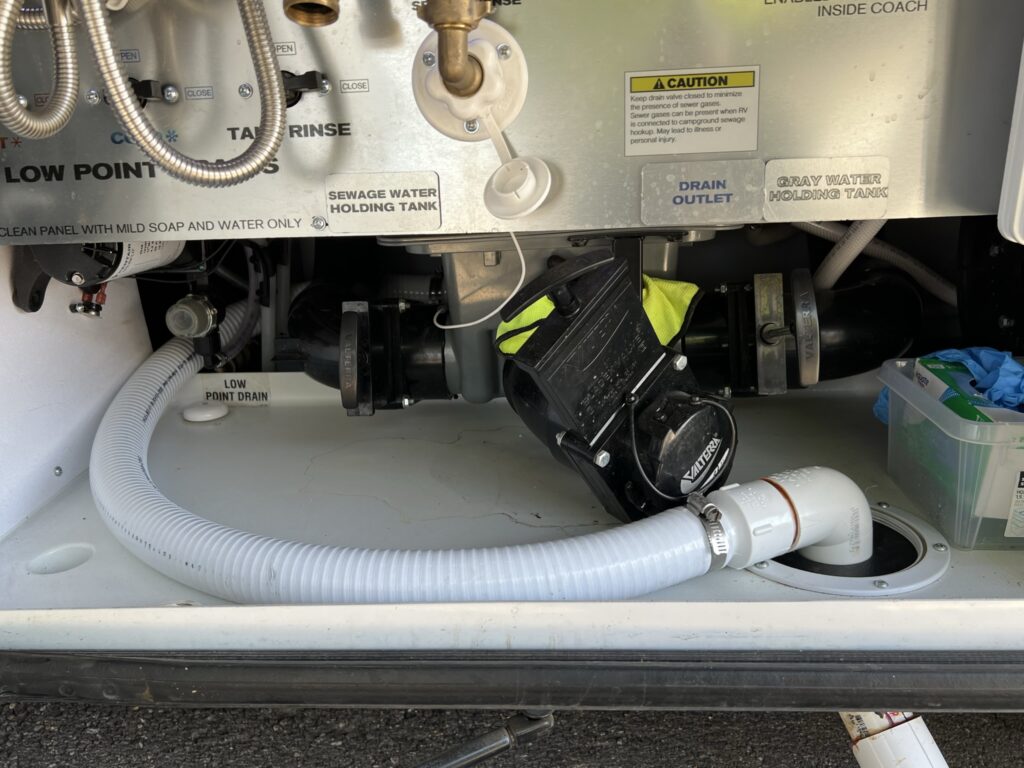
I added a few PVC connections with some 1.5″ PVC pipe to glue it all together, used a rubber coupling to join it to my Banjo connecter and had what I wanted (make sure you leave the black o-ring that blocks the hole in the wet bay in-place)!
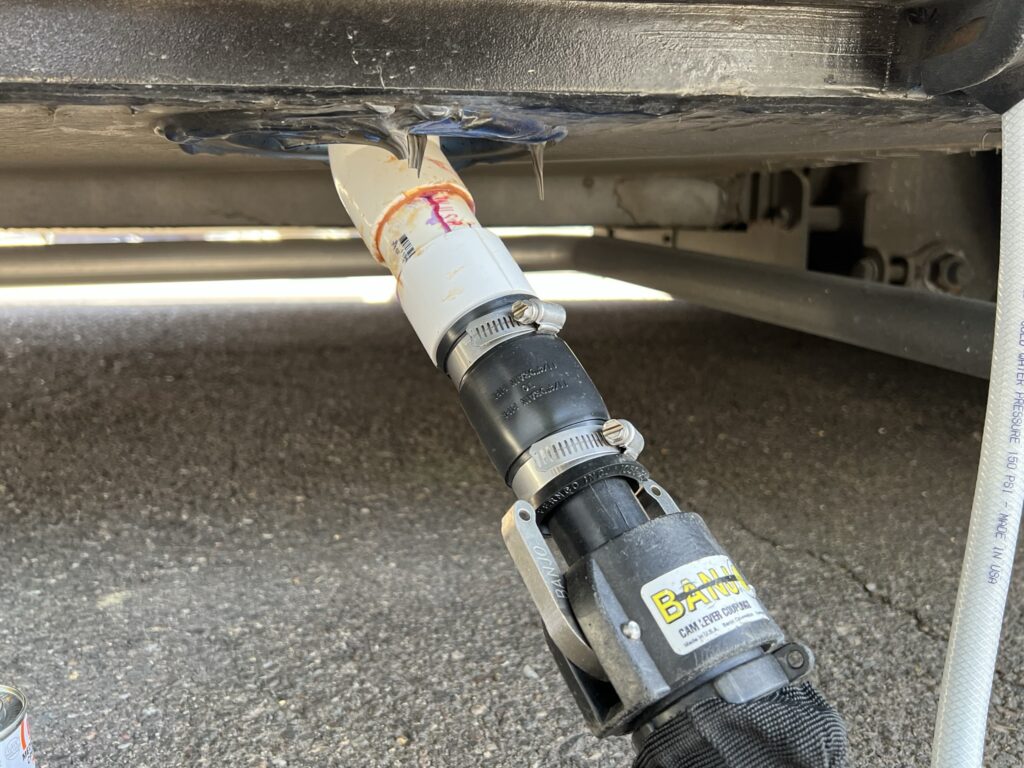
The setup allows me to drop this system through the hole in the wet bay, connect my modular Sanicon Turbo hose to it with the Banjo clamps, and keep all the flexible hose outside of the wet bay. The added benefit is that if we are camping in the rain and our Sanicon Turbo hose gets all dirty, its ok, because it does not get stored in the wet bay (we keep it in the host compartment above the tag axle).
One thing I love about these Banjo connectors is you can get plugs/covers to keep things closed up when not in use. I put a plug in the end of the bus connection side of things and can keep this setup in the bay…safe, sound, and CLEAN!
Once I got this all done, I had a bit of ‘cleanup’ and ‘bleaching’ and ‘cleanup’ (and shudders and a few nightmares about the leak and cleanup) and have a great setup!!!
Update – 12/21/2022 – Storage
I was asked what it looks like when the hose was stored. I store the Sanicon hose that comes off completey with the Banjo connectors in the little compartment above the rear tires. In fact, I fit 2 of these hoses (in case I need to pump that S**t further) as well as a couple of other connectors (need another blog post on those…) and the sanicon adapter for the park sewer connection.
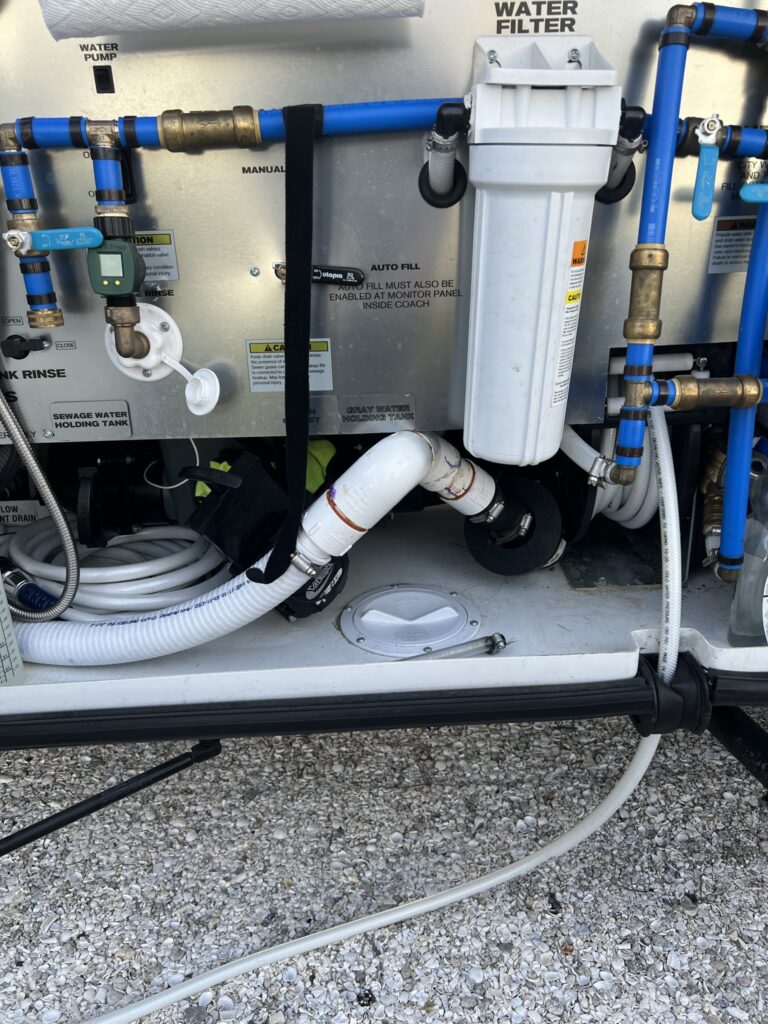
Here is what it looks like in the wet bay ready to travel:
Parts List


